Bosses in Arcane Lineage range from manageable for solo beginners to formidable, requiring coordinated teams to defeat. Each presents unique challenges and mechanics, demanding strategic planning and patience to overcome. Victory yields some of the game’s finest loot and items. Follow our Arcane Lineage Boss Guide to gear up for the toughest battles.
Table of Contents
Arcane Lineage Boss ListKing Slime
King Slime Location
King Slime Fighting Strategy
King Slime Drops and Rewards
Yar’thul, the Blazing Dragon
Yar’thul Location
Yar’thul Fighting Strategy
Yar’thul Drops and Rewards
Thorian, the Rotten
Thorian Location
Thorian Fighting Strategy
Thorian Drops and Rewards
Metrom’s Vessel
Metrom’s Vessel Location
Metrom’s Vessel Fighting Strategy
Metrom’s Vessel Drops and Rewards
Arkhaia and Seraphon
Arcane Lineage Boss List
| Boss | Location | Difficulty |
|---|---|---|
| King Slime | Near the City | Easy |
| Yar’thul, the Blazing Dragon | Within Mount Thul | Normal |
| Thorian, the Rotten | Cess Grounds Depths | Hard |
| Metrom’s Vessel | Deeproot Canopy | Very Hard |
| Seraphon | Unlocked via Church of Raphion Rank-Up | Hard |
| Arkhaia | Unlocked via Cult of Thanasius Rank-Up | Very Hard |
King Slime
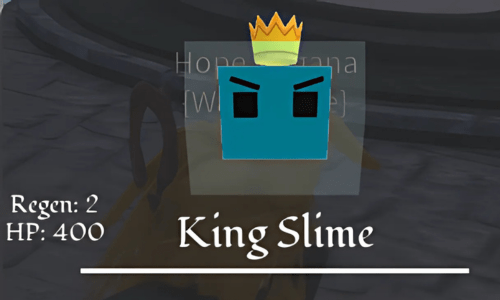
This foe is more of a minor challenge compared to other Bosses in Arcane Lineage. Still, novice players may struggle. Note that defeating this boss does not grant soul points.
King Slime Location
King Slime appears after 100 Slimes are defeated on the server, spawning near the city closest to the last slain Slime. A notification on the Quest Board signals the active King Slime quest, which includes two steps:
Find the King Slime Kill the King Slime
This quest has a 30-minute server-wide cooldown.
King Slime Fighting Strategy
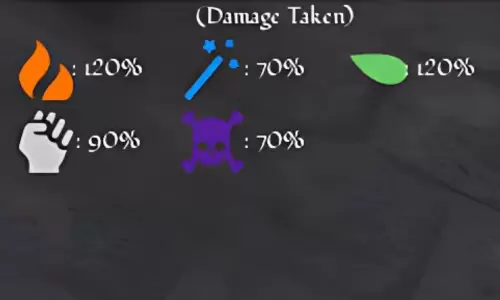
With 400 HP (600 HP if Corrupted), this Boss has the lowest health among Arcane Lineage bosses. Its primary tactic is summoning additional Slimes that can overwhelm your team over time, complemented by area-of-effect poison attacks. Equip potions and cleansing skills to counter these. Its low health makes for a straightforward fight—eliminate the summoned Slimes and defeat the boss in a few turns. The AOE attacks apply a Poisoned status but deal no direct damage, giving you ample opportunity to strike.
| Attacks | Energy Cost | Effect |
|---|---|---|
| Slime Creation | 1 | Summons a Slime to aid King Slime in battle. |
| Crush | 0 | King Slime lunges forward, striking a party member. |
| Poison Eruption | 2 | King Slime releases a burst of acid, poisoning the party. This attack cannot be dodged or blocked. |
| Scalding Spray | 3 | King Slime unleashes boiling liquid, poisoning the party. This attack cannot be dodged. |
King Slime Drops and Rewards
Defeating King Slime may yield these items:
Random Tier 1 EquipmentSlime Buckler
Gelat Ring
Completing the King Slime event via the Quest Board may reward:
Ferrus Skin PotionSmall Health Potion
Essence
Gold
Yar’thul, the Blazing Dragon
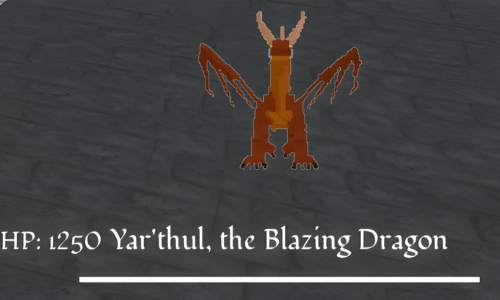
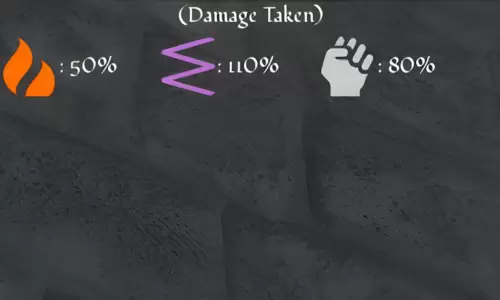
This fire-based boss unleashes Fire and Inferno attacks, inflicting heavy damage. Nearly all its moves apply Inferno and Burning effects, making preparation crucial. It resists fire and physical damage but is vulnerable to Hex damage.
Yar’thul Location
To locate Yar’thul in Arcane Lineage, venture deep into the Desert to find Mount Thul, a volcano fueled by Yar’thul’s intense heat. Navigate its dark corridors to confront the Blazing Dragon at the summit.
Yar’thul Fighting Strategy
This dragon boasts 1200 HP (1800 HP if Corrupted), compensating for lower durability with high damage output. Its attacks inflict Inferno and Burning effects, making this a race against time to defeat it before your party succumbs. Below 50% health, it enters a second phase, summoning meteors that stun and reduce healing. End the fight quickly, as prolonged meteor strikes can wipe your team. Equipping a Dragon Ring and Pristine-level accessories eases the battle. The Corrupted version gains lifesteal.
| Attacks | Energy Cost | Effect |
|---|---|---|
| Inferno | 0 | Automatically triggers at battle start, applying the Inferno status to the party. Cannot be dodged or blocked. |
| Fire Claw | 0 | Yar’thul slashes with fiery claws, dealing minor damage. |
| Magma Pillar | 2 | Yar’thul slams the ground, summoning a magma pillar that damages attackers and applies 2 Inferno and 5 Burn stacks for 3 turns. |
| Blaze Core | 3 | Yar’thul consumes party Inferno stacks to heal itself. |
| Blaze Eruption | 2 | Yar’thul slams the ground, escalating damage to burning targets and adding Inferno and Burning stacks. |
| Magma Beam | 4 | Yar’thul charges a massive fire beam for one turn, then fires it, hitting adjacent units. Cannot be dodged or blocked. |
| Hellfire | 1 | Yar’thul unleashes an unavoidable fire wave, dealing light damage and applying 9 Burning stacks. Cannot be dodged or blocked. |
| Armageddon | 6 | Below 50% health, Yar’thul may summon a meteor, dealing massive damage, applying healing reduction, and possibly stunning the party. Can be used multiple times. Cannot be dodged or blocked. |
Yar’thul Drops and Rewards
Defeating Yar’thul guarantees these rewards:
Absolute RadiancePermafrost Curse
Wild Impulse
Heavenly Prayer
Breath of Fungyir
Narhana’s Sigil
Reality Watch
Shifting Hourglass
Ring of the Dragon
The Void Key (Corrupted Yar’thul)
Possible drops include:
Dragontooth BladeDragonbone Gauntlets
Dragonbone Spear
Dragonflame Shield
Memory Fragment
Soul Dust
Phoenix Tear
Resplendant Essence
Lineage Shard
Skyward Totem
Thorian, the Rotten
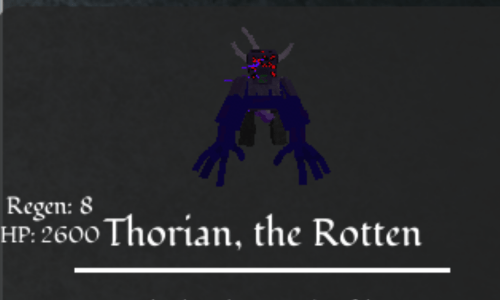
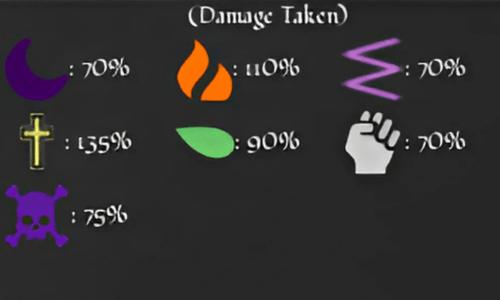
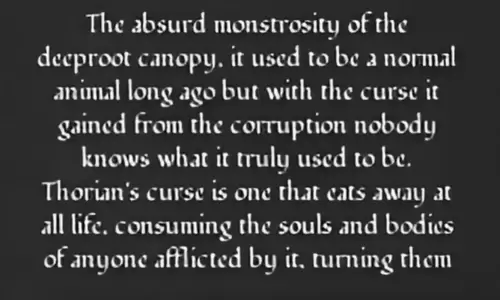
Once an animal in the Deeproot Canopy, Thorian became a corrupted, towering monstrosity with red eyes and tentacles, cursing all who approach. It resists most elements but is highly vulnerable to Holy damage.
Thorian Location
Find Thorian in the deepest parts of the Cess Grounds within the Deeproot Canopy. From the entrance, head right and continue in that direction. Its massive, grotesque form is unmistakable.
Thorian Fighting Strategy
With 2600 HP (3900 HP if Corrupted), Thorian presents a complex bossfight. Its passive negations heal it for 150% of damage if attacked twice consecutively with the same attack type, requiring varied attacks and careful energy management. It resists most damage types except Holy, which deals 135% damage, and slightly Fire (10% increase). Below 50% health, it unleashes a devastating attack, inflicting Plague, Curse, and Hexed, with a 15-turn cooldown.
Below 50% health, Thorian unleashes a devastating attack, applying Plague, Curse, and Hexed to the party. With a 15-turn cooldown, this move rarely repeats, allowing the fight to continue normally.
| Attacks | Energy Cost | Effect |
|---|---|---|
| Cursed Wave | 2 | Thorian strikes three party members, possibly inflicting Curse. |
| Overflowing Curse | 0 | Triggers a minigame; failure inflicts Plague. Cannot be dodged or blocked. |
| Cess Breath | 1 | Thorian emits a toxic wave, dealing AOE damage and debuffing the party. |
| Warped Crush | 1 | Thorian charges, damaging three party members. |
| Blasphemous Obliteration | 5 | Below 50% health, Thorian rages, devastating the party with 1 Plague, 3 Curse, and 1 Hexed stack. Cannot be dodged or blocked. |
| Hexed Burst | 1 | Thorian emits a small AOE wave, damaging the party and possibly applying 1 Hexed or 3 Curse stacks. |
| Plague Rupture | 2 | Thorian applies a random debuff, then ruptures a party member, dealing massive damage based on debuff count. |
Thorian Drops and Rewards
Defeating Thorian guarantees these rewards:
Absolute RadiancePermafrost Curse
Wild Impulse
Heavenly Prayer
Breath of Fungyir
Stellian Core
Metrom’s Amulet
Darksigil
Ring of Blight
The Void Key (Corrupted Thorian)
Possible drops include:
Blightrock DaggerBlightwood Staff
Memory Fragment
Soul Dust
Phoenix Tear
Resplendant Essence
Lineage Shard
Skyward Totem
Metrom’s Vessel
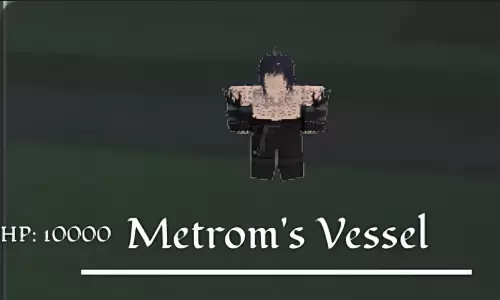
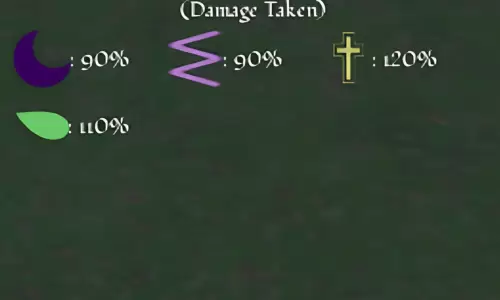

Once a noble hero, Metrom’s Vessel is now a hollow shell possessed by Metrom. Sealed in a Temporal Jail after attempting vengeance on mortals, this containment weakens its power significantly.
Metrom’s Vessel Location
Unlike other Bosses, Metrom’s Vessel is a Raid Boss spawning on a global timer. Entry requires a Void Key, earned by defeating corrupted versions of prior bosses. Await the server-wide alert for Metrom’s Vessel spawn location.
Metrom’s Vessel Fighting Strategy
A true behemoth, Metrom’s Vessel boasts 10,000 HP (15,000 if Corrupted) and massive damage negation, requiring 30–60 minutes to defeat. Its two phases feature unique moves, offensive and defensive mechanics, and immense damage output.
In phase one, its black wings grant significant damage negation. Destroy them by applying status effects and debuffs, but time this carefully—fewer wings increase its damage. Destroying all wings prematurely unlocks phase-two attacks early, complicating the fight.
It also summons Shadeblades, fragile minions with 200 HP that deal high damage. Eliminate them quickly. Prolonging phase one risks Oblivion, an unavoidable attack dealing 50% max HP to all.
In phase two, Metrom’s Vessel collapses, shattering the Temporal Jail. Its wings toggle between Offensive mode, boosting damage and minion strength, and Defensive mode, granting high resistance and a Thorns Aura that reflects damage. Destroy wings with status effects, as in phase one. A Mini Shadebringer spawns for extra attacks when players fail to dodge.
To defeat it efficiently, coordinate with your team to apply consistent debuffs and damage-reducing effects. Its massive health demands endurance and mastery of its wing mechanics for a manageable fight.
Phase 1 Attacks
| Attacks | Energy Cost | Effect |
|---|---|---|
| Rendering Slash | 0 | Metrom’s Vessel lunges, damaging a player and applying 3 Weakness stacks. |
| Deathbound | 1 | Metrom’s Vessel targets two players, applying 3 Sundered stacks. |
| Eclipse | 1 | Metrom’s Vessel buffs itself. |
| Invoke Shadeblades | 3 | Metrom’s Vessel summons two 200-HP Shadeblades. Cannot be dodged or blocked. |
| Hexed Rend | 3 | An unavoidable AOE slash debuffing all players. Cannot be dodged or blocked. |
| Oblivion | 5 | Metrom’s Vessel uses ancient magic, dealing 50% HP damage and applying Curse. Cannot be dodged or blocked. |
Phase 2 Attacks
| Attacks | Energy Cost | Effect |
|---|---|---|
| Oblivion + Eclipse | 1 | Metrom’s Vessel combines Rendering Slash (P1) with Hexed Rend (P1). |
| Unyielding Fury | 2 | An AOE debuff applying 3 Blind and 2 Hexed stacks to all players. Cannot be dodged or blocked. |
| Minishade Bringer | 3 | Metrom’s Vessel fires 3 Shadebringers. Cannot be dodged or blocked. |
| Shadebringer | 1 | Metrom’s Vessel slashes with 3 Shadebringers, hitting all and applying 4 Cursed stacks. Cannot be dodged or blocked. |
| Blackout | 2 | Metrom’s Vessel debuffs the entire party. Cannot be dodged or blocked. |
Metrom’s Vessel Drops and Rewards
Defeating Metrom’s Vessel guarantees these rewards:
Metrom’s GraspChaos Orb
Expedite Anklet
Echo Shard
Tempurus Gem
Arcanium Crystal
Possible drops include:
Darkblood StaffDarkblood Dagger
Darkblood Spear
Darkblood Hexer
Darkblood Sword
Darkblood Cestus
Arkhaia and Seraphon
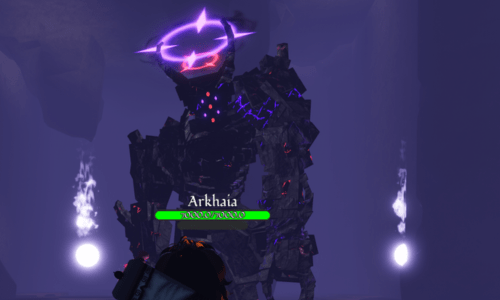
Details on Arkhaia and Seraphon are scarce due to their rarity. These challenging bosses feature complex mechanics, making them unsuitable for beginners, even with strong teams. They are the current pinnacle of Arcane Lineage bosses.
Unlock Arkhaia by reaching rank 20 in the Cult of Thanasius. With 7000 HP, its damage-over-time mechanics are tricky. Defeating Arkhaia allows starting a new character with the rare, powerful Inferion race.
Unlock Seraphon by reaching rank 20 in the Church of Raphion. With 4500 HP, defeating it grants the option to start a new character with the rare, powerful Sheea race in Arcane Lineage.
That concludes our Arcane Lineage Boss guide. Want to grow stronger? Explore our comprehensive Arcane Lineage Class Tier List and guide.

 Latest Downloads
 Downlaod


 Top News